Traditional lime plaster isn't applied in one pass — it's built in three distinct coats, each with its own job, thickness, and curing time. Understanding what's actually inside a wall explains why lime plaster lasts for centuries when it's done right, and why rushing any single stage is where most repairs go wrong.
Scratch Coat
Coarse stuff / first coat — 3/8" to 3/4"
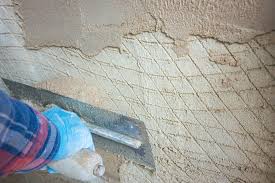
The foundation. A thick, rough application of lime, sand, and natural hair fiber pressed firmly into the lath or substrate. Before it hardens, horizontal lines are scratched into the surface — hence the name — to key the next coat. The hair fiber distributes shrinkage stress as the coat cures, preventing cracking.
Brown Coat
Coarse stuff / second coat — 1/4" to 1/2"
The leveling coat. Applied over the cured scratch coat, the brown coat is worked flat and even, providing the canvas the finish coat will sit on. It must be given time to cure fully — applying the finish coat too soon is one of the most common causes of delamination. Patience here is not optional.
Finish Coat
Setting stuff / top coat — 3/16" to 1/4"
The surface you see and touch. This is where the craft lives. The finish coat is worked to match the texture, sheen, and character of the original. Whether smooth, floated, or textured, it determines whether the repair is visible or invisible. It cures by carbonation over weeks and months — continuing to harden and develop long after the plasterer has left.
Three coats, three purposes, and none of them skippable — which is the whole difference between a repair that lasts and one that doesn't.